Building a Full-Stack Serverless Application with Cloudflare Workers
Publikováno: 9.8.2019
One of my favorite developments in software development has been the advent of serverless. As a developer who has a tendency to get bogged down in the details of deployment and DevOps, it's refreshing to be given a mode of building web applications that simply abstracts scaling and infrastructure away from me. Serverless has made me better at actually shipping projects!
That being said, if you're new to serverless, it may be unclear how to translate the things that … Read article
The post Building a Full-Stack Serverless Application with Cloudflare Workers appeared first on CSS-Tricks.
One of my favorite developments in software development has been the advent of serverless. As a developer who has a tendency to get bogged down in the details of deployment and DevOps, it's refreshing to be given a mode of building web applications that simply abstracts scaling and infrastructure away from me. Serverless has made me better at actually shipping projects!
That being said, if you're new to serverless, it may be unclear how to translate the things that you already know into a new paradigm. If you're a front-end developer, you may have no experience with what serverless purports to abstract away from you – so how do you even get started?
Today, I'll try to help demystify the practical part of working with serverless by taking a project from idea to production, using Cloudflare Workers. Our project will be a daily leaderboard, called "Repo Hunt" inspired by sites like Product Hunt and Reddit, where users can submit and upvote cool open-source projects from GitHub and GitLab. You can see the final version of the site, published here.
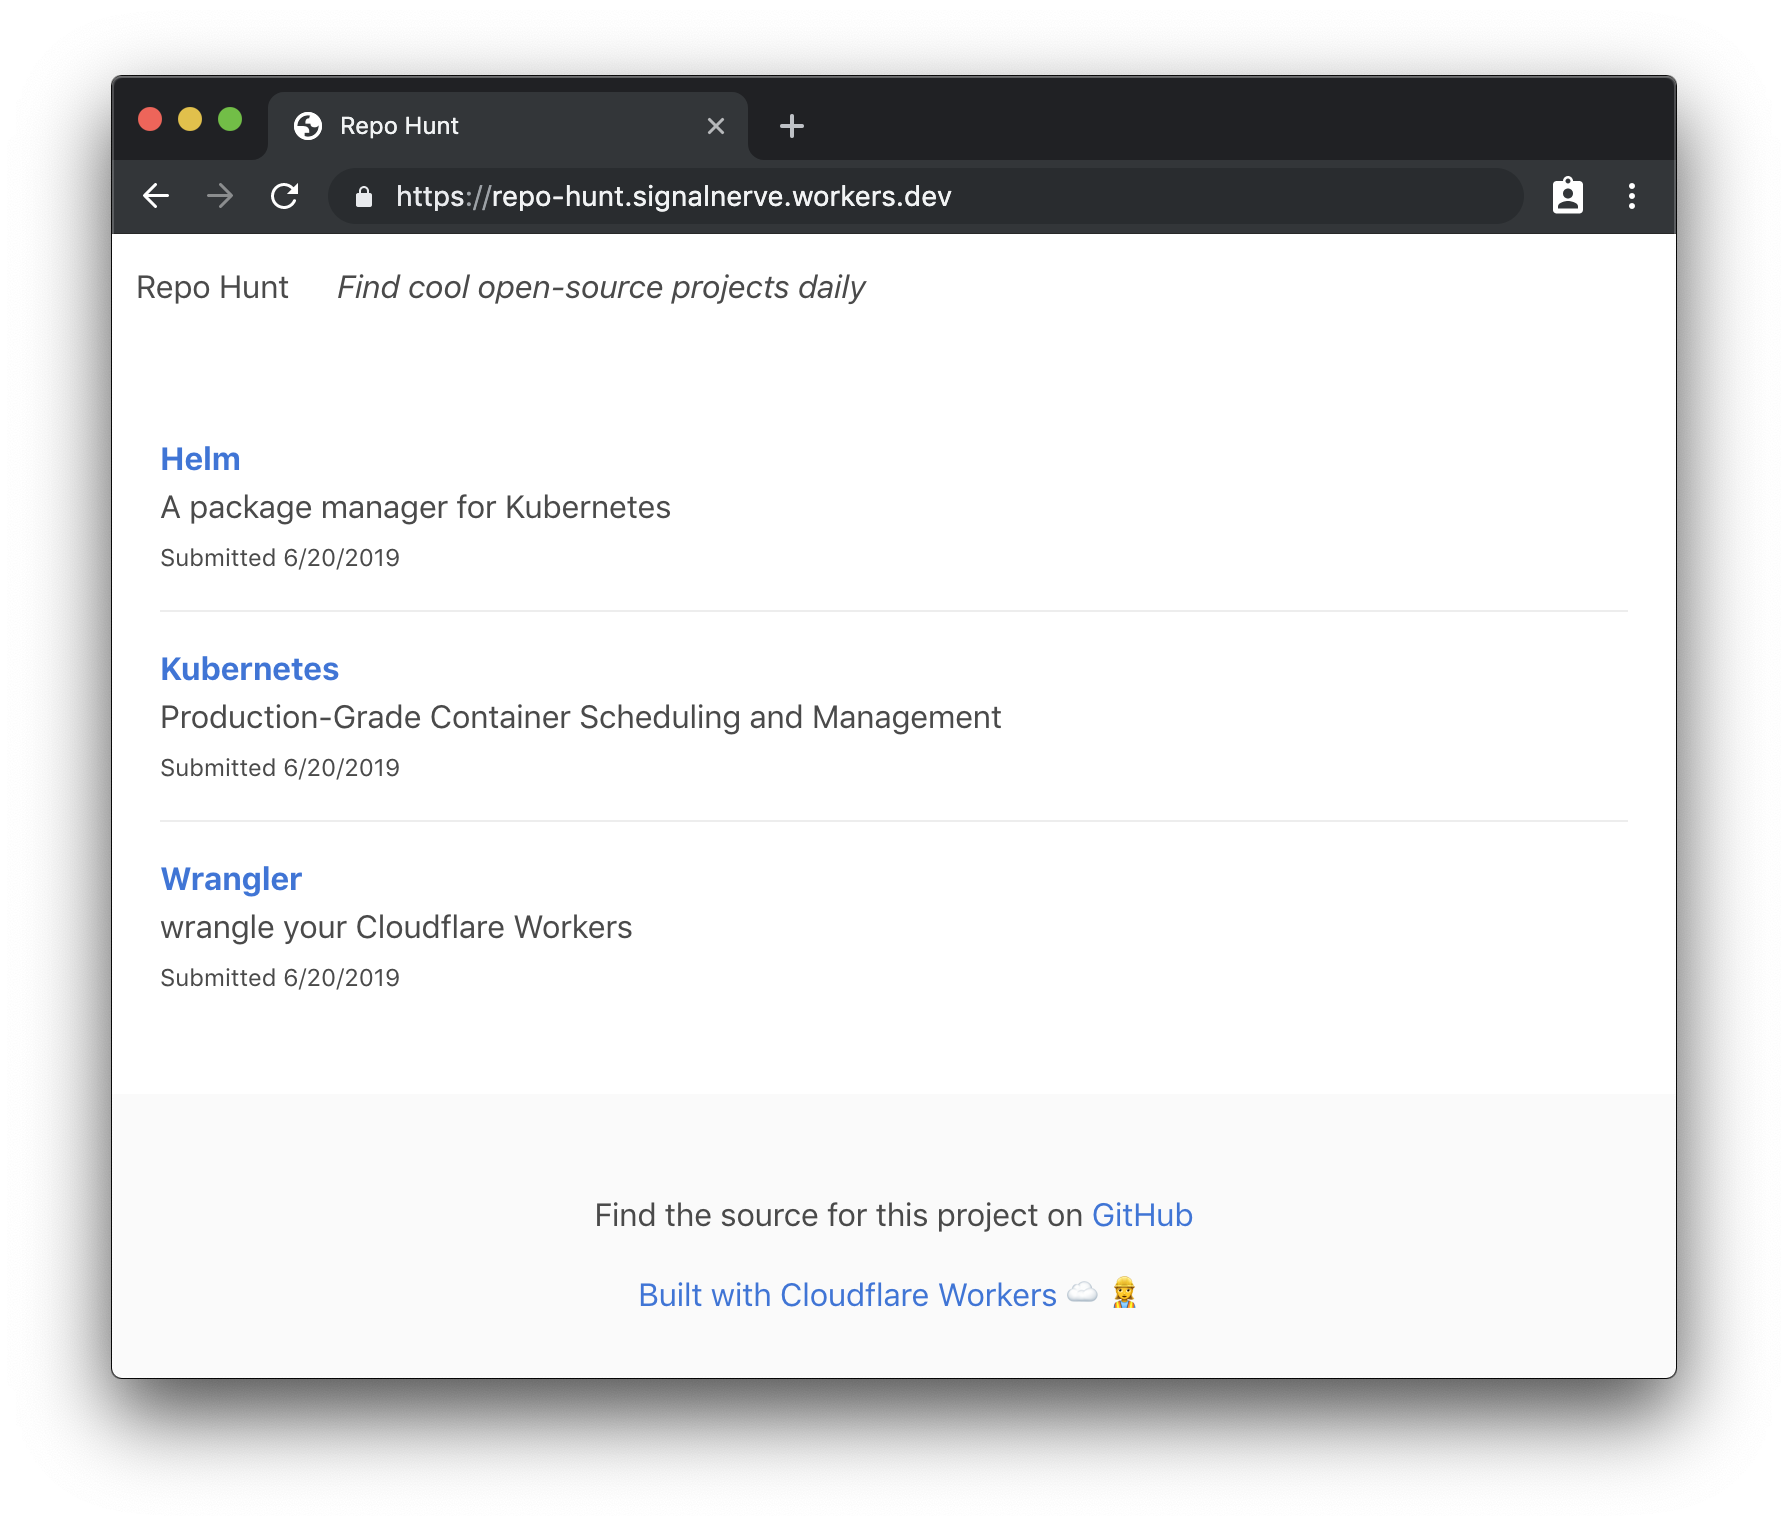
Workers is a serverless application platform built on top of Cloudflare's network. When you publish a project to Cloudflare Workers, it's immediately distributed across 180 (and growing) cities around the world, meaning that regardless of where your users are located, your Workers application will be served from a nearby Cloudflare server with extremely low latency. On top of that, the Workers team has gone all-in on developer experience: our newest release, at the beginning of this month, introduced a fully-featured command line tool called Wrangler, which manages building, uploading, and publishing your serverless applications with a few easy-to-learn and powerful commands.
The end result is a platform that allows you to simply write JavaScript and deploy it to a URL – no more worrying about what "Docker" means, or if your application will fall over when it makes it to the front page of Hacker News!
If you're the type that wants to see the project ahead of time, before hopping into a long tutorial, you're in luck! The source for this project is available on GitHub. With that, let's jump in to the command-line and build something rad.
Installing Wrangler and preparing our workspace
Wrangler is the command-line tool for generating, building, and publishing Cloudflare Workers projects. We've made it super easy to install, especially if you've worked with npm before:
npm install -g @cloudflare/wranglerOnce you've installed Wrangler, you can use the generate command to make a new project. Wrangler projects use "templates" which are code repositories built for re-use by developers building with Workers. We maintain a growing list of templates to help you build all kind of projects in Workers: check out our Template Gallery to get started!
In this tutorial, we'll use the "Router" template, which allows you to build URL-based projects on top of Workers. The generate command takes two arguments: first, the name of your project (I'll use repo-hunt), and a Git URL. This is my favorite part of the generate command: you can use all kinds of templates by pointing Wrangler at a GitHub URL, so sharing, forking, and collaborating on templates is super easy. Let's run the generate command now:
wrangler generate repo-hunt https://github.com/cloudflare/worker-template-router
cd repo-hunt
The Router template includes support for building projects with webpack, so you can add npm modules to your project, and use all the JavaScript tooling you know and love. In addition, as you might expect, the template includes a Router class, which allows you to handle routes in your Worker, and tie them to a function. Let's look at a simple example: setting up an instance of Router, handling a GET request to /, and returning a response to the client:
// index.js
const Router = require('./router')

addEventListener('fetch', event => {
  event.respondWith(handleRequest(event.request))
})

async function handleRequest(request) {
  try {
    const r = new Router()
    r.get('/', () => new Response("Hello, world!"))
    const resp = await r.route(request)
    return resp
  } catch (err) {
    return new Response(err)
  }
}
All Workers applications begin by listening to the fetch event, which is an incoming request from a client to your application. Inside of that event listener, it's common practice to call a handleRequest function, which looks at the incoming request and determines how to respond. When handling an incoming fetch event, which indicates an incoming request, a Workers script should always return a Response back to the user: it's a similar request/response pattern to many web frameworks, like Express, so if you've worked with web frameworks before, it should feel quite familiar!
In our example, we'll make use of a few routes: a "root" route (/), which will render the homepage of our site; a form for submitting new repos, at /post, and a special route for accepting POST requests, when a user submits a repo from the form, at /repo.
Building a route and rendering a template
The first route that we'll set up is the "root" route, at the path /. This will be where repos submitted by the community will be rendered. For now, let's get some practice defining a route, and returning plain HTML. This pattern is common enough in Workers applications that it makes sense to understand it first, before we move on to some more interesting bits!
To begin, we'll update index.js to set up an instance of a Router, handle any GET requests to /, and call the function index, from handlers/index.js (more on that shortly):
// index.js
const Router = require('./router')
const index = require('./handlers/index')

addEventListener('fetch', event => {
  event.respondWith(handleRequest(event.request))
})

function handleRequest(request) {
  try {
    const r = new Router()
    r.get('/', index)
    return r.route(request)
  } catch (err) {
    return new Response(err)
  }
}
As with the example index.js in the previous section, our code listens for a fetch event, and responds by calling the handleRequest function. The handleRequest function sets up an instance of Router, which will call the index function on any GET requests to /. With the router setup, we route the incoming request, using r.route, and return it as the response to the client. If anything goes wrong, we simply wrap the content of the function in a try/catch block, and return the err to the client (a note here: in production applications, you may want something more robust here, like logging to an exception monitoring tool).
To continue setting up our route handler, we'll create a new file, handlers/index.js, which will take the incoming request and return a HTML response to the client:
// handlers/index.js
const headers = { 'Content-Type': 'text/html' }
const handler = () => {
  return new Response("Hello, world!", { headers })
}
module.exports = handler
Our handler function is simple: it returns a new instance of Response with the text "Hello, world!" as well as a headers object that sets the Content-Type header to text/html – this tells the browser to render the incoming response as an HTML document. This means that when a client makes a GET request to the route /, a new HTML response will be constructed with the text "Hello, world!" and returned to the user.
Wrangler has a preview function, perfect for testing the HTML output of our new function. Let's run it now to ensure that our application works as expected:
wrangler previewThe preview command should open up a new tab in your browser, after building your Workers application and uploading it to our testing playground. In the Preview tab, you should see your rendered HTML response:
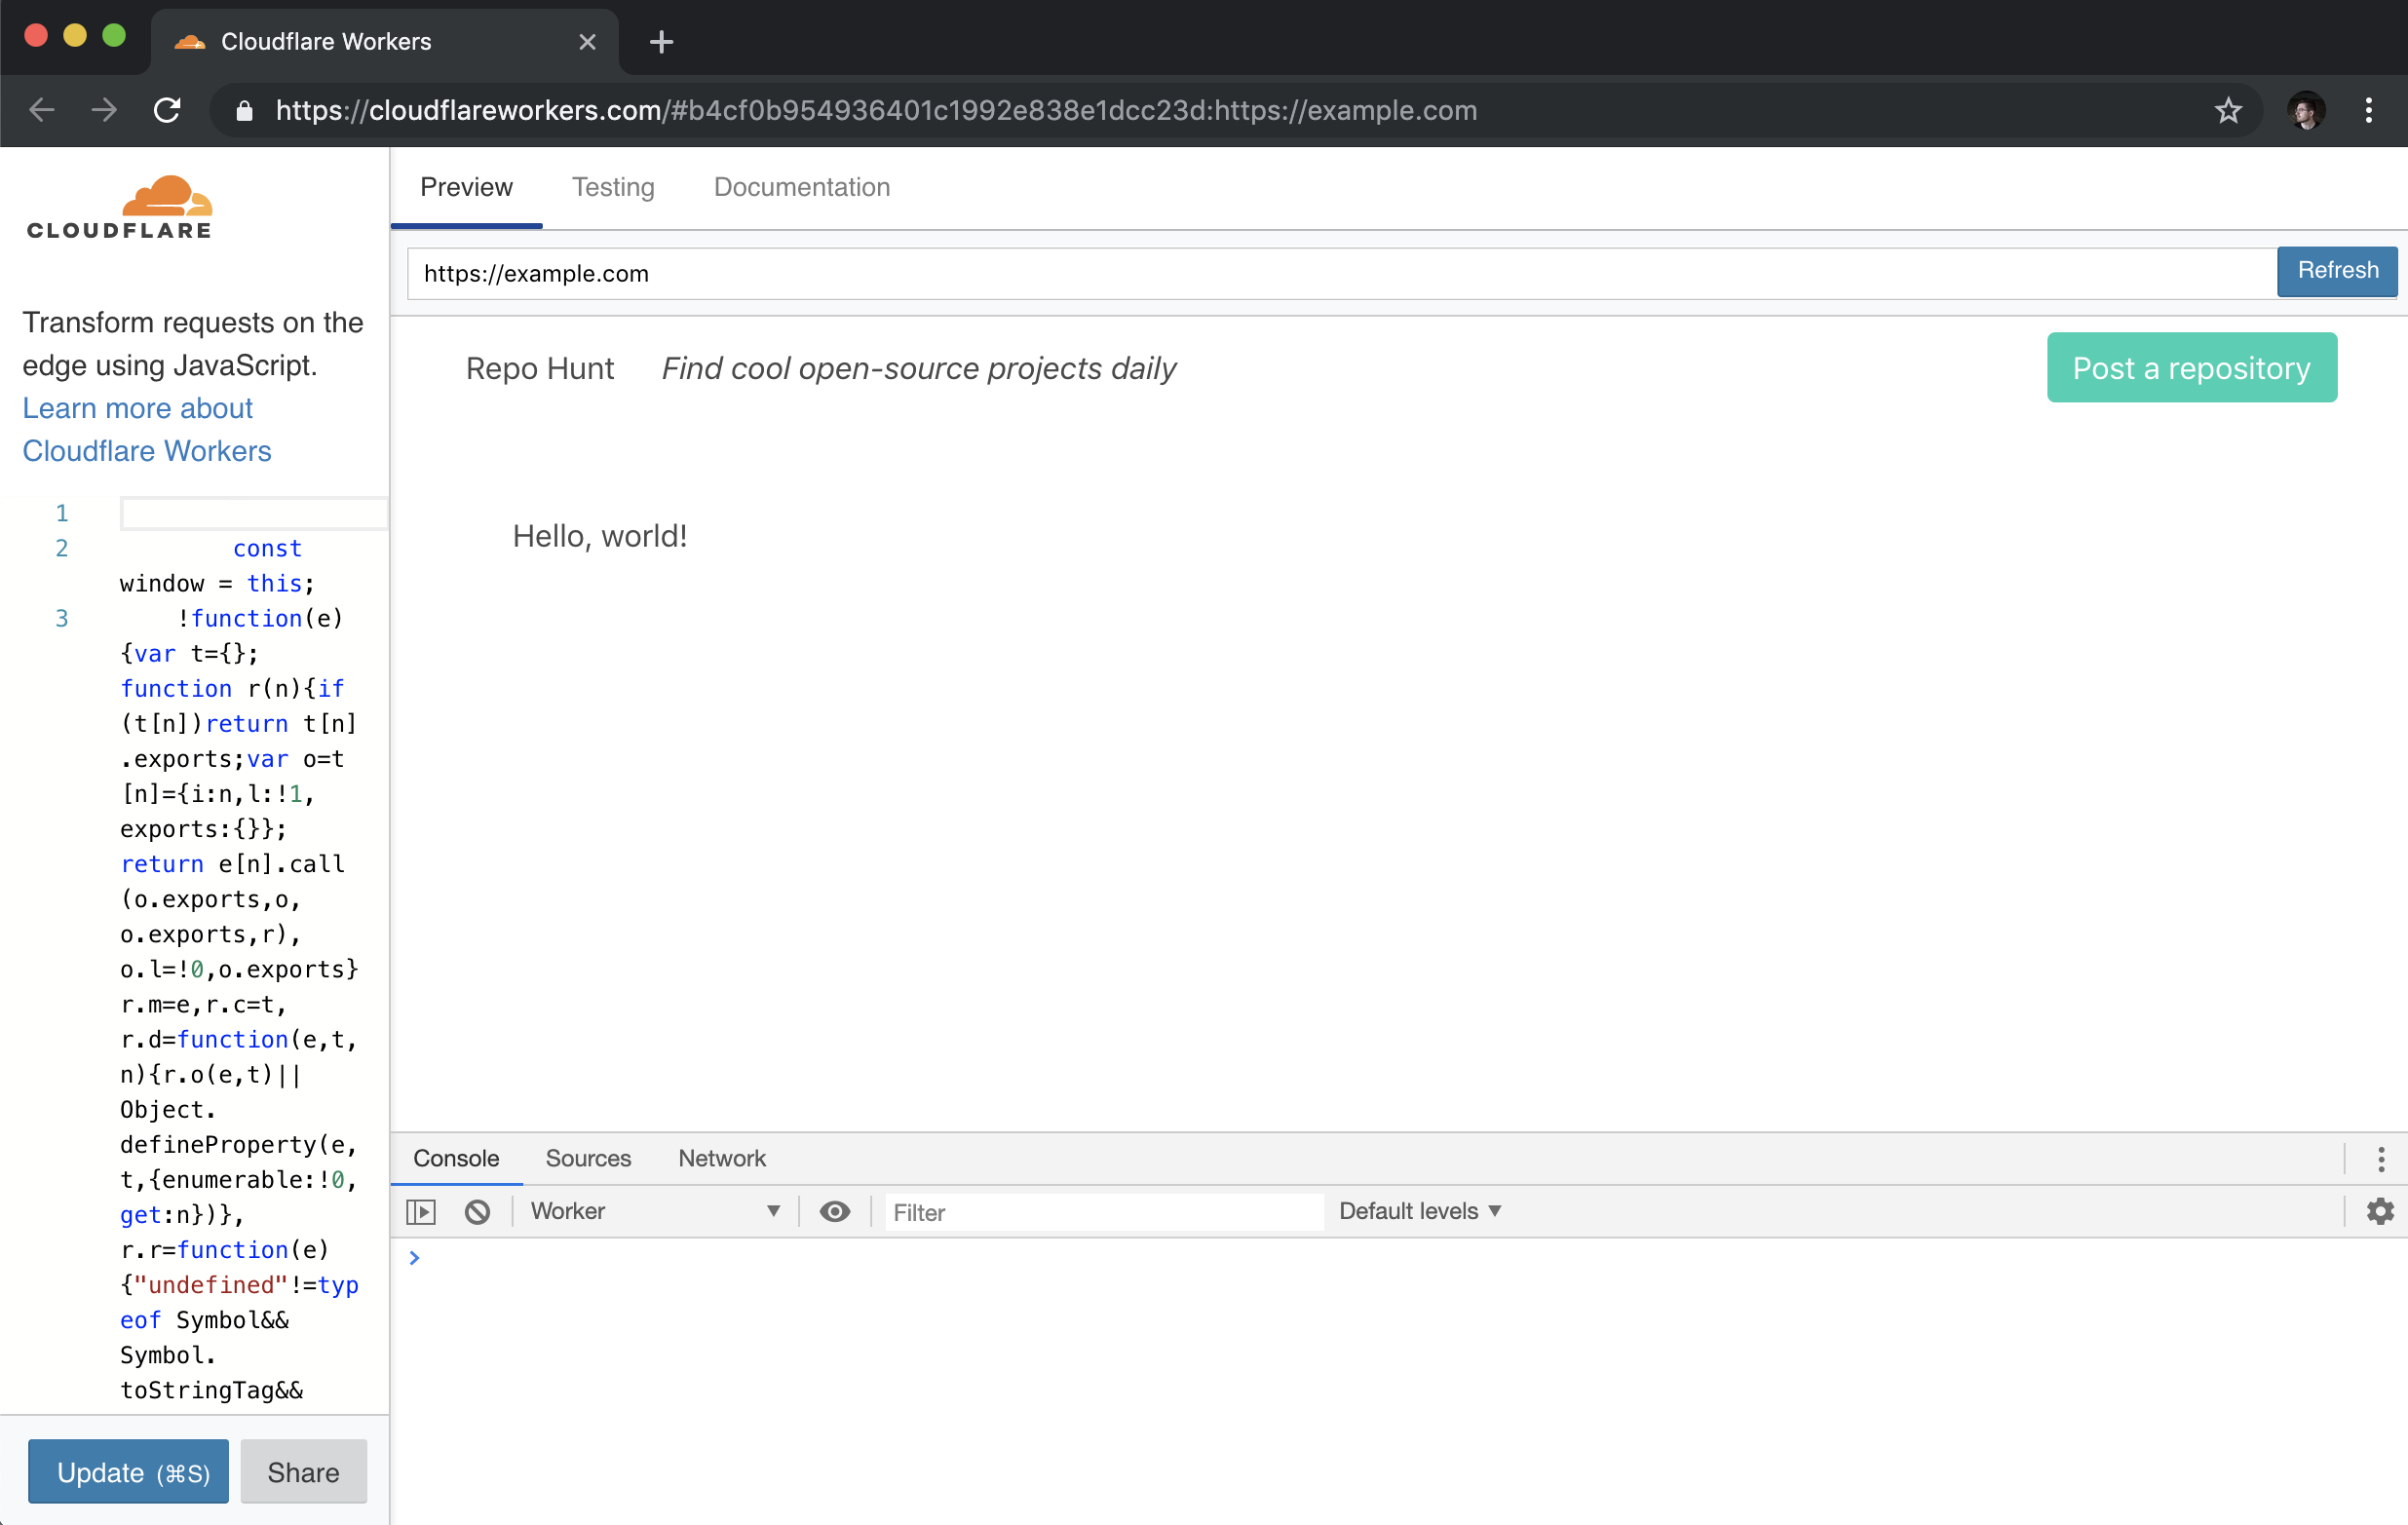
With our HTML response appearing in browser, let's make our handler function a bit more exciting, by returning some nice looking HTML. To do this, we'll set up a corresponding index "template" for our route handler: when a request comes into the index handler, it will call the template and return an HTML string, to give the client a proper user interface as the response. To start, let's update handlers/index.js to return a response using our template (and, in addition, set up a try/catch block to catch any errors, and return them as the response):
// handlers/index.js
const headers = { 'Content-Type': 'text/html' }
const template = require('../templates/index')

const handler = async () => {
  try {
    return new Response(template(), { headers })
  } catch (err) {
    return new Response(err)
  }
}

module.exports = handler
As you might imagine, we need to set up a corresponding template! We'll create a new file, templates/index.js, and return an HTML string, using ES6 template strings:
// templates/index.js
const template = () => {
  return <code><h1>Hello, world!</h1>`
}

module.exports = template
Our template function returns a simple HTML string, which is set to the body of our Response, in handlers/index.js. For our final snippet of templating for our first route, let's do something slightly more interesting: creating a templates/layout.js file, which will be the base "layout" that all of our templates will render into. This will allow us to set some consistent styling and formatting for all the templates. In templates/layout.js:
// templates/layout.js
const layout = body => `
<!doctype html>
<html>
<head>
<meta charset="UTF-8">
<title>Repo Hunt</title>
<meta name="viewport" content="width=device-width, initial-scale=1">
<link rel="stylesheet" href="https://cdnjs.cloudflare.com/ajax/libs/bulma/0.7.5/css/bulma.min.css">
</head>
<body>
<div class="container">
<div class="navbar">
<div class="navbar-brand">
Repo Hunt
</div>
<div class="navbar-menu">
<div class="navbar-end">
<div class="navbar-item">
Post a repository
</div>
</div>
</div>
</div>
<div class="section">
${body}
</div>
</div>
</body>
</html>
`
module.exports = layoutThis is a big chunk of HTML code, but breaking it down, there's only a few important things to note: first, this layout variable is a function! A body variable is passed in, intended to be included inside of a div right in the middle of the HTML snippet. In addition, we include the Bulmahttps://bulma.io) CSS frameworkhttps://bulma.io), for a bit of easy styling in our project, and a navigation bar, to tell users *what* this site is, with a link to submit new repositories.
To use our layout template, we'll import it in templates/index.js, and wrap our HTML string with it:
// templates/index.js
const layout = require('./layout')

const template = () => {
  return layout(`<h1>Hello, world!</h1>`)
}

module.exports = template
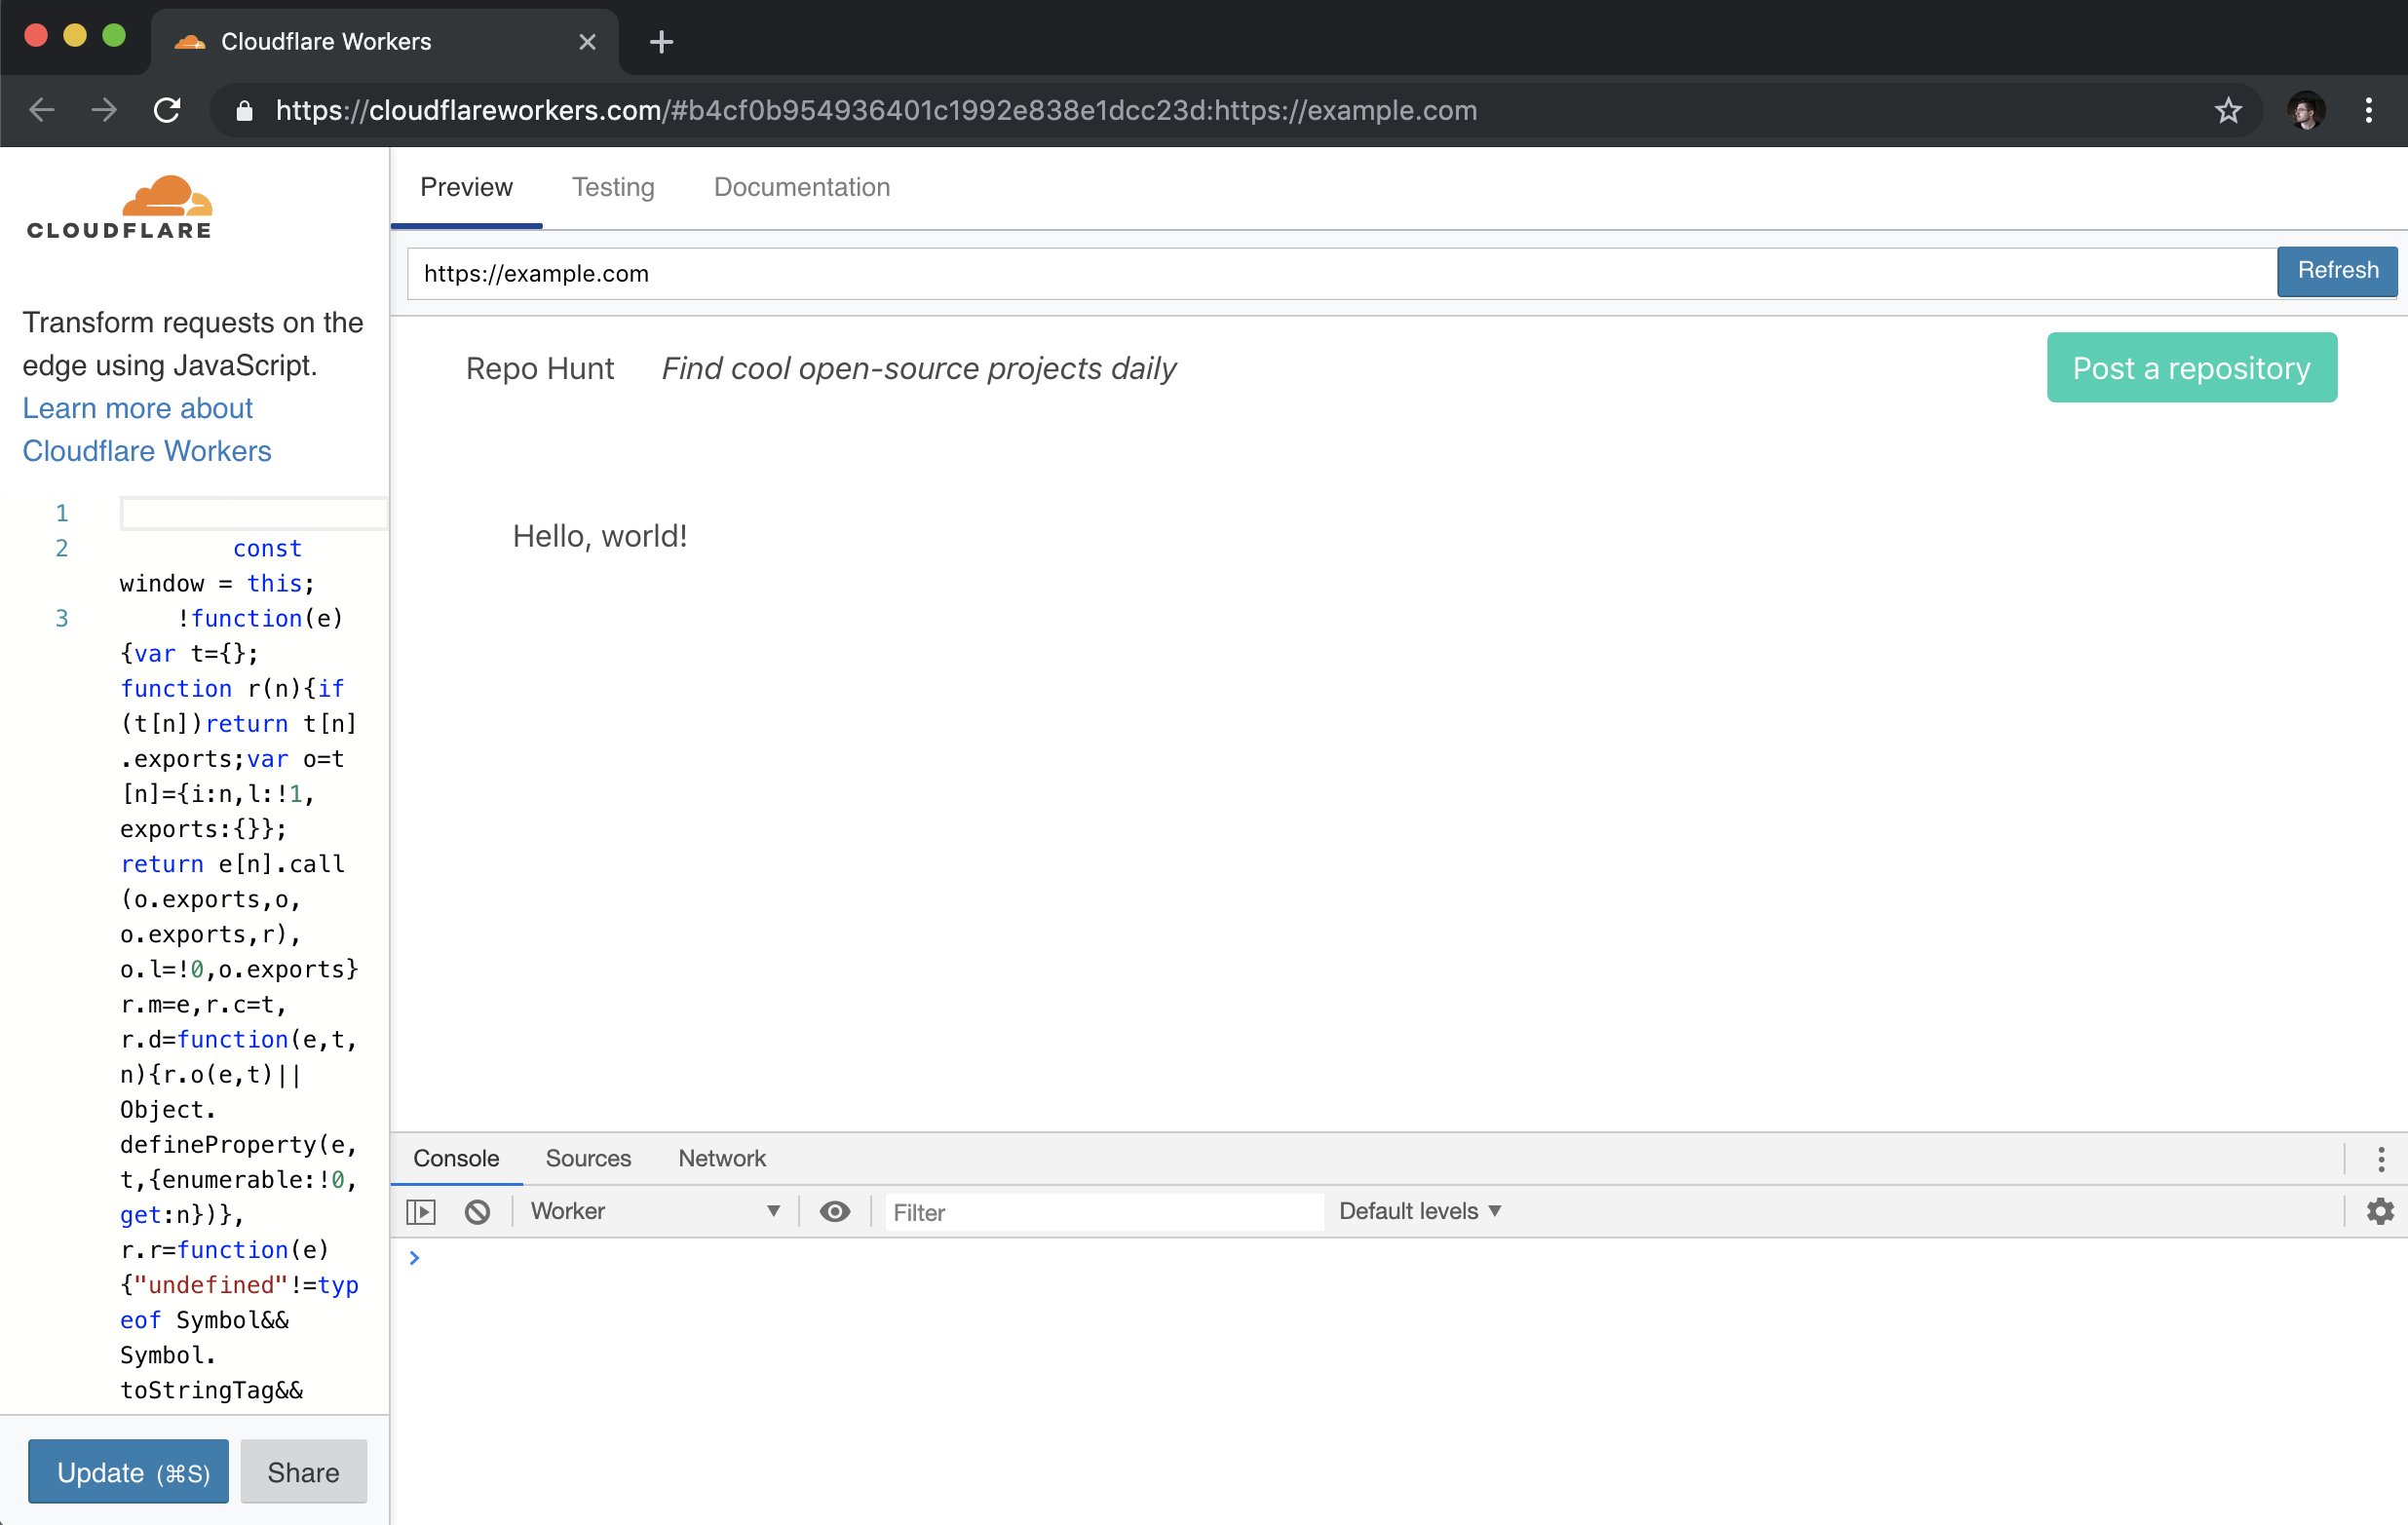
With that, we can run wrangler preview again, to see our nicely rendered HTML page, with a bit of styling help from Bulma:
Storing and retrieving data with Workers KV
Most web applications aren't very useful without some sort of data persistence. Workers KV is a key-value store built for use with Workers – think of it as a super-fast and globally distributed Redis. In our application, we'll use KV to store all of the data for our application: each time a user submits a new repository, it will be stored in KV, and we'll also generate a daily array of repositories to render on the home page.
A quick note: at the time of writing, usage of Workers KV requires a paid Workers plan. Read more in the "Pricing" section of the Workers docs here.
Inside of a Workers application, you can refer to a pre-defined KV namespace, which we'll create inside of the Cloudflare UI, and bind to our application once it's been deployed to the Workers application. In this tutorial, we'll use a KV namespace called REPO_HUNT, and as part of the deployment process, we'll make sure to attach it to our application, so that any references in the code to REPO_HUNT will correctly resolve to the KV namespace.
Before we hop into creating data inside of our namespace, let's look at the basics of working with KV inside of your Workers application. Given a namespace (e.g. REPO_HUNT), we can set a key with a given value, using put:
const string = "Hello, world!"
REPO_HUNT.put("myString", string)
We can also retrieve the value for that key, by using async/await and waiting for the promise to resolve:
const getString = async () => {
  const string = await REPO_HUNT.get("myString")
  console.log(string) // "Hello, world!"
}
The API is super simple, which is great for web developers who want to start building applications with the Workers platform, without having to dive into relational databases or any kind of external data service. In our case, we'll store the data for our application by saving:
- A repo object, stored at the key
repos:$id, where$idis a generated UUID for a newly submitted repo. - A day array, stored at the key
$date(e.g."6/24/2019"), containing a list of repo IDs, which indicate the submitted repos for that day.
We'll begin by implementing support for submitting repositories, and making our first writes to our KV namespace by saving the repository data in the object we specified above. Along the way, we'll create a simple JavaScript class for interfacing with our store – we'll make use of that class again, when we move on to rendering the homepage, where we'll retrieve the repository data, build a UI, and finish our example application.
Allowing user-submitted data
No matter what the application is, it seems that web developers always end up having to write forms. In our case, we'll build a simple form for users to submit repositories.
At the beginning of this tutorial, we set up index.js to handle incoming GET requests to the root route (`/). To support users adding new repositories, we'll add another route, GET /post, which will render a form template to users. In index.js:
// index.js

// ...

const post = require('./handlers/post')

// ...

function handleRequest(request) {
  try {
    const r = new Router()
    r.get('/', index)
    r.get('/post', post)
    return r.route(request)
  } catch (err) {
    return new Response(err)
  }
}
In addition to a new route handler in index.js, we'll also add handlers/post.js, a new function handler that will render an associated template as an HTML response to the user:
// handlers/post.js
const headers = { 'Content-Type': 'text/html' }
const template = require('../templates/post')

const handler = request => {
  try {
    return new Response(template(), { headers })
  } catch (err) {
    return new Response(err)
  }
}

module.exports = handler
The final piece of the puzzle is the HTML template itself – like our previous template example, we'll re-use the layout template we've built, and wrap a simple three-field form with it, exporting the HTML string from templates/post.js:
// templates/post.js
const layout = require('./layout')

const template = () =>
  layout(`
  <div>
    <h1>Post a new repo</h1>
    <form action="/repo" method="post">
      <div class="field">
        <label class="label" for="name">Name</label>
        <input class="input" id="name" name="name" type="text" placeholder="Name" required></input>
      </div>
      <div class="field">
        <label class="label" for="description">Description</label>
        <input class="input" id="description" name="description" type="text" placeholder="Description"></input>
      </div>
      <div class="field">
        <label class="label" for="url">URL</label>
        <input class="input" id="url" name="url" type="text" placeholder="URL" required></input>
      </div>
      <div class="field">
        <div class="control">
          <button class="button is-link" type="submit">Submit</button>
        </div>
      </div>
    </form>
  </div>
<code>)

module.exports = template
Using wrangler preview, we can navigate to the path /post and see our rendered form:
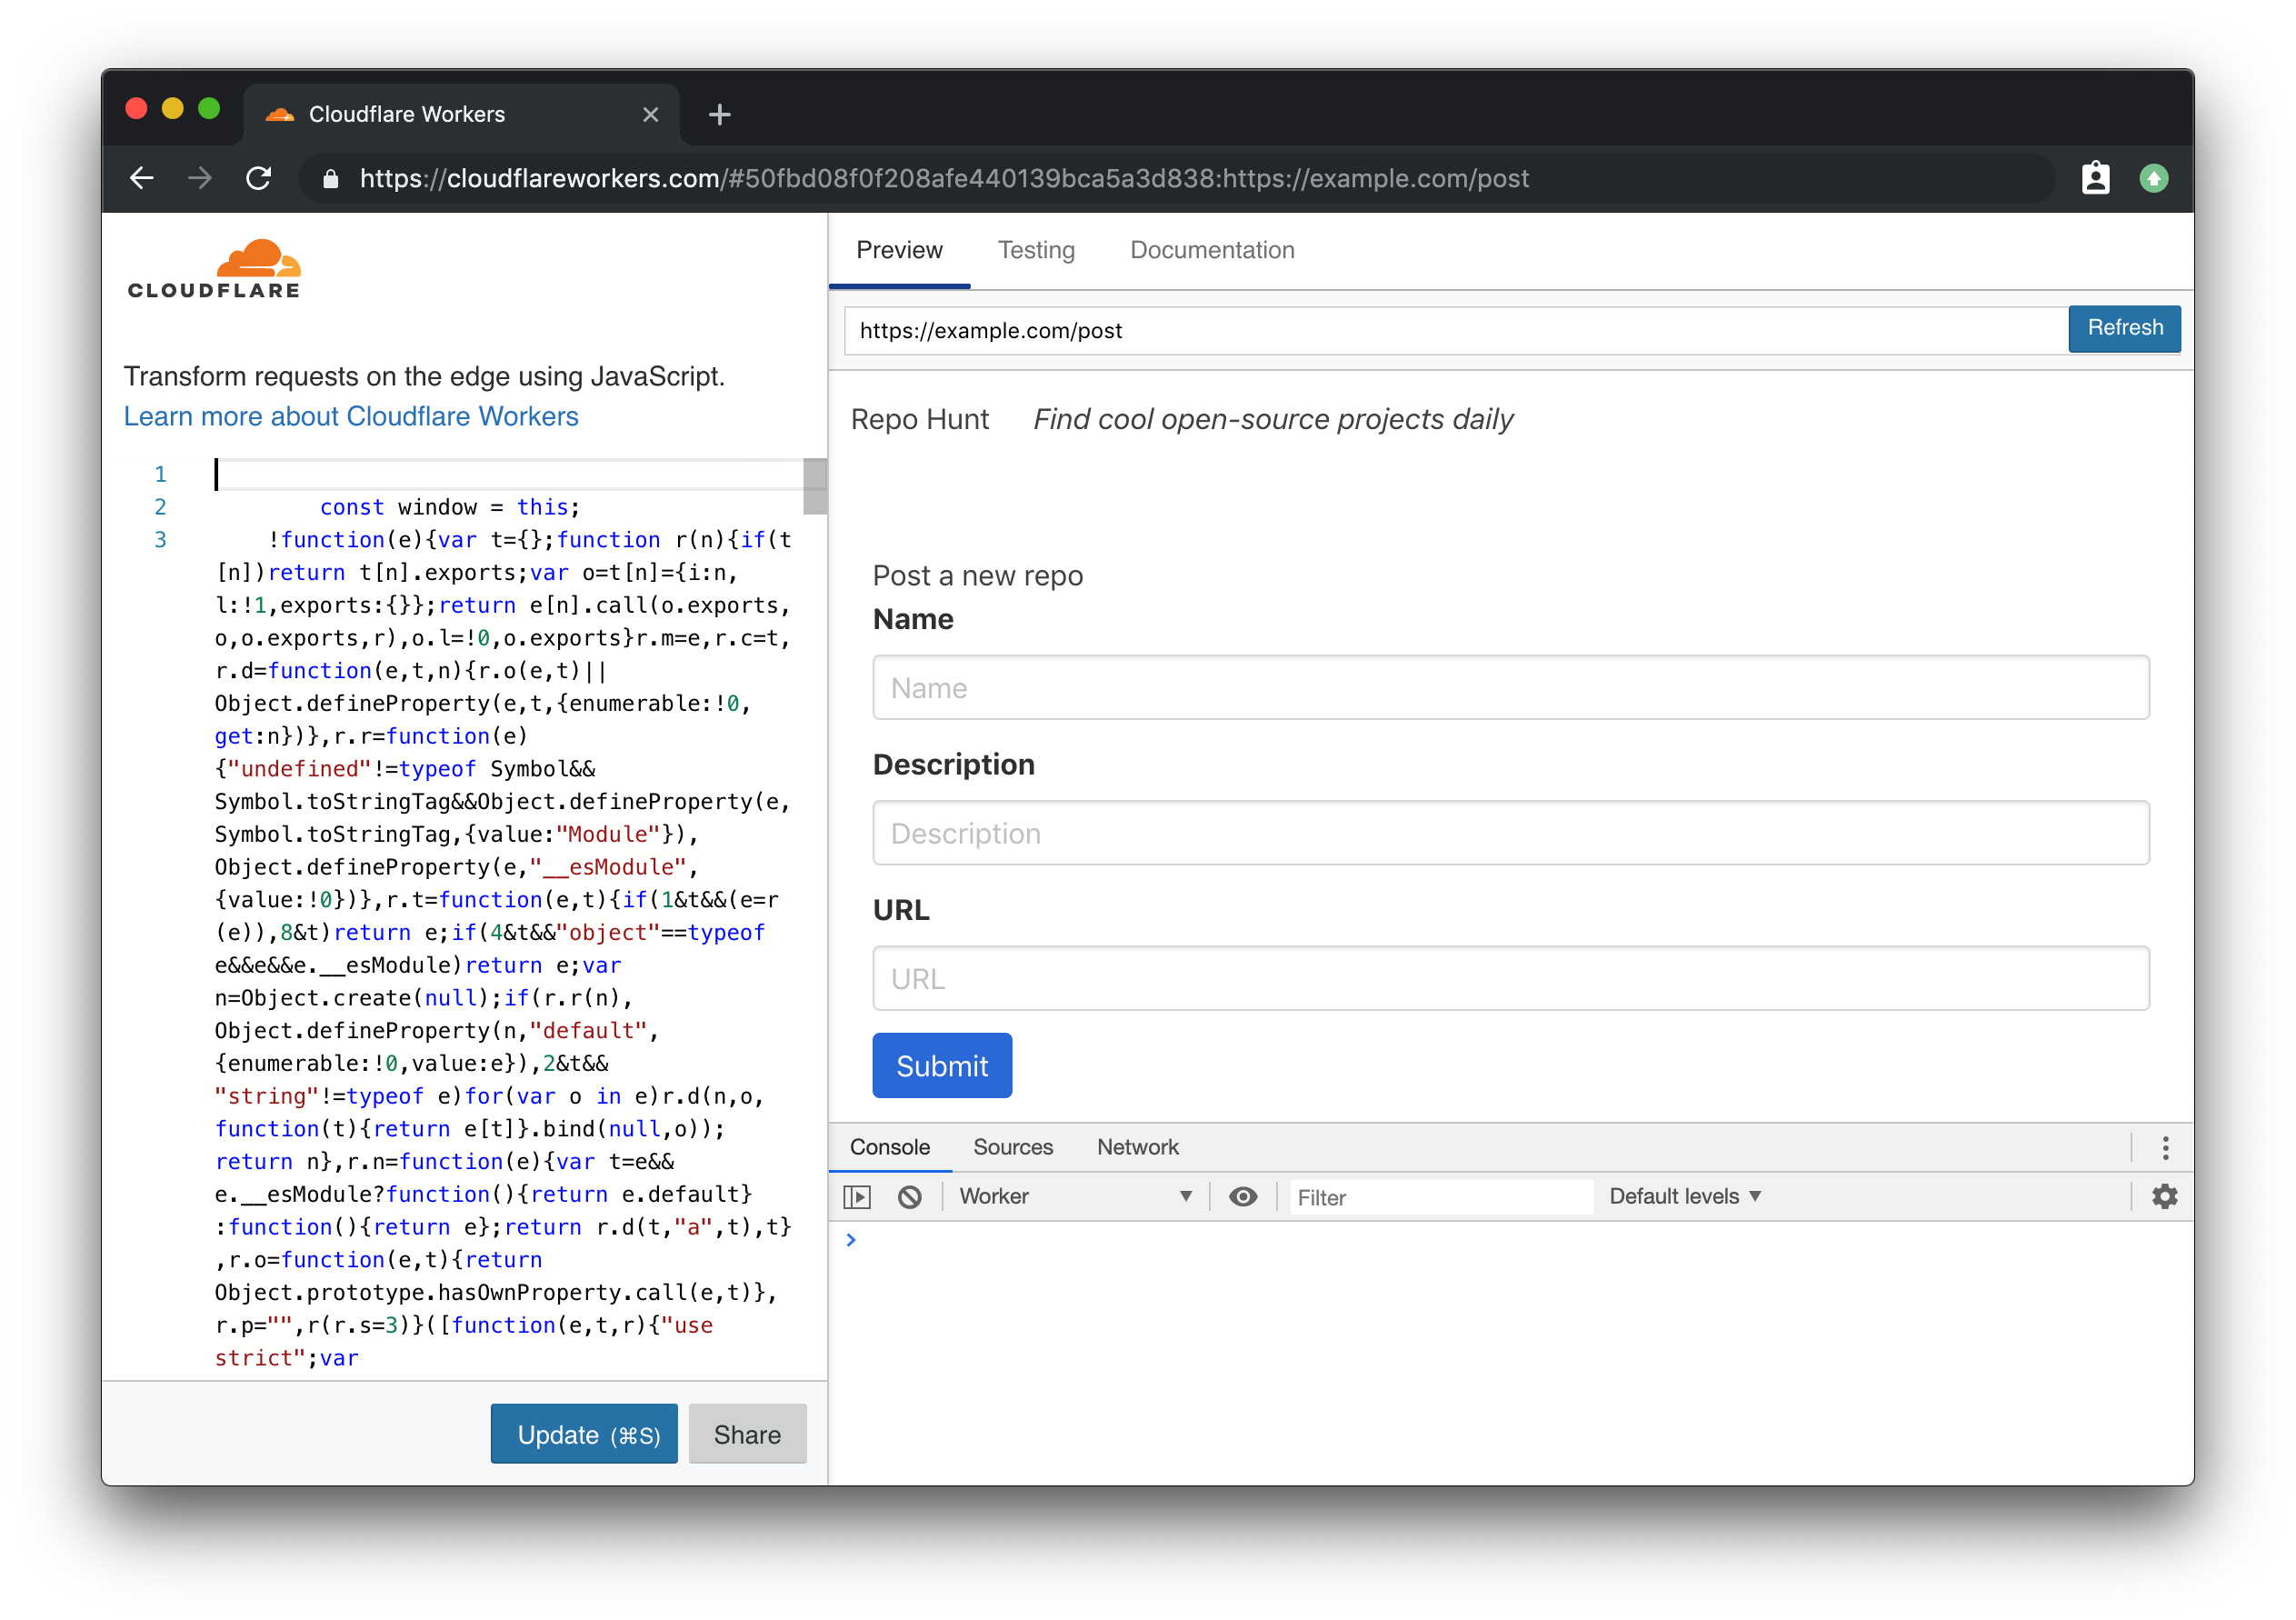
If you look at the definition of the actual form tag in our template, you'll notice that we're making a POST request to the path /repo. To receive the form data, and persist it into our KV store, we'll go through the process of adding another handler. In index.js:
// index.js

// ...

const create = require('./handlers/create')

// ...

function handleRequest(request) {
  try {
    const r = new Router()
    r.get('/', index)
    r.get('/post', post)
    r.post('/repo', create)
    return r.route(request)
  } catch (err) {
    return new Response(err)
  }
}
When a form is sent to an endpoint, it's sent as a query string. To make our lives easier, we'll include the qs library in our project, which will allow us to simply parse the incoming query string as a JS object. In the command line, we'll add qs simply by using npm. While we're here, let's also install the node-uuid package, which we'll use later to generate IDs for new incoming data. To install them both, use npm's install --save subcommand:
npm install --save qs uuidWith that, we can implement the corresponding handler function for POST /repo. In handlers/create.js:
// handlers/create.js
const qs = require('qs')

const handler = async request => {
  try {
    const body = await request.text()

    if (!body) {
      throw new Error('Incorrect data')
    }

    const data = qs.parse(body)

    // TODOs:
    // - Create repo
    // - Save repo
    // - Add to today's repos on the homepage

    return new Response('ok', { headers: { Location: '/' }, status: 301 })
  } catch (err) {
    return new Response(err, { status: 400 })
  }
}

module.exports = handler
Our handler function is pretty straightforward — it calls text on the request, waiting for the promise to resolve to get back our query string body. If no body element is provided with the request, the handler throws an error (which returns with a status code of 400, thanks to our try/catch block). Given a valid body, we call parse on the imported qs package, and get some data back. For now, we've stubbed out our intentions for the remainder of this code: first, we'll create a repo, based on the data. We'll save that repo, and then add it to the array of today's repos, to be rendered on the home page.
To write our repo data into KV, we'll build two simple ES6 classes, to do a bit of light validation and define some persistence methods for our data types. While you could just call REPO_HUNT.put directly, if you're working with large amounts of similar data, it can be nice to do something like new Repo(data).save() - in fact, we'll implement something almost exactly like this, so that working with a Repo is incredibly easy and consistent.
Let's define store/repo.js, which will contain a Repo class. With this class, we can instantiate new Repo objects, and using the constructor method, we can pass in data, and validate it, before continuing to use it in our code.
// store/repo.js
const uuid = require('uuid/v4')

class Repo {
  constructor({ id, description, name, submitted_at, url }) {
    this.id = id || uuid()
    this.description = description

    if (!name) {
      throw new Error(`Missing name in data`)
    } else {
      this.name = name
    }

    this.submitted_at = submitted_at || Number(new Date())

    try {
      const urlObj = new URL(url)
      const whitelist = ['github.com', 'gitlab.com']

      if (!whitelist.some(valid => valid === urlObj.host)) {
        throw new Error('The URL provided is not a repository')
      }
    } catch (err) {
      throw new Error('The URL provided is not valid')
    }

    this.url = url
  }

  save() {
    return REPO_HUNT.put(`repos:${this.id}`, JSON.stringify(this))
  }
}

module.exports = Repo
Even if you aren't super familiar with the constructor function in an ES6 class, this example should still be fairly easy to understand. When we want to create a new instance of a Repo, we pass the relevant data to constructor as an object, using ES6's destructuring assignment to pull each value out into its own key. With those variables, we walk through each of them, assigning this.$key (e.g. this.name, this.description, etc) to the passed-in value.
Many of these values have a "default" value: for instance, if no ID is passed to the constructor, we'll generate a new one, using our previously-saved uuid package's v4 variant to generate a new UUID, using uuid(). For submitted_at, we'll generate a new instance of Date and convert it to a Unix timestamp, and for url, we'll insure that the URL is both valid *and* is from github.com or gitlab.com to ensure that users are submitting genuine repos.
With that, the save function, which can be called on an instance of Repo, inserts a JSON-stringified version of the Repo instance into KV, setting the key as repos:$id. Back in handlers/create.js, we'll import the Repo class, and save a new Repo using our previously parsed data:
// handlers/create.js

// ...

const Repo = require('../store/repo')

const handler = async request => {
  try {
    // ...

    const data = qs.parse(body)
    const repo = new Repo(data)
    await repo.save()

    // ...
  } catch (err) {
    return new Response(err, { status: 400 })
  }
}

// ...
With that, a new Repo based on incoming form data should actually be persisted into Workers KV! While the repo is being saved, we also want to set up another data model, Day, which contains a simple list of the repositories that were submitted by users for a specific day. Let's create another file, store/day.js, and flesh it out:
// store/day.js
const today = () => new Date().toLocaleDateString()
const todayData = async () => {
  const date = today()
  const persisted = await REPO_HUNT.get(date)
  return persisted ? JSON.parse(persisted) : []
}

module.exports = {
  add: async function(id) {
    const date = today()
    let ids = await todayData()
    ids = ids.concat(id)
    return REPO_HUNT.put(date, JSON.stringify(ids))
  }
}
Note that the code for this isn't even a class — it's an object with key-value pairs, where the values are functions! We'll add more to this soon, but the single function we've defined, add, loads any existing repos from today's date (using the function today to generate a date string, used as the key in KV), and adds a new Repo, based on the id argument passed into the function. Back inside of handlers/create.js, we'll make sure to import and call this new function, so that any new repos are added immediately to today's list of repos:
// handlers/create.js

// ...

const Day = require('../store/day')

// ...

const handler = async request => {
  try {

    // ...

    await repo.save()
    await Day.add(repo.id)

    return new Response('ok', { headers: { Location: '/' }, status: 301 })
  } catch (err) {
    return new Response(err, { status: 400 })
  }
}

// ...
Our repo data now persists into KV and it's added to a listing of the repos submitted by users for today's date. Let's move on to the final piece of our tutorial, to take that data, and render it on the homepage.
Rendering data
At this point, we've implemented rendering HTML pages in a Workers application, as well as taking incoming data, and persisting it to Workers KV. It shouldn't surprise you to learn that taking that data from KV, and rendering an HTML page with it, our homepage, is quite similar to everything we've done up until now. Recall that the path / is tied to our index handler: in that file, we'll want to load the repos for today's date, and pass them into the template, in order to be rendered. There's a few pieces we need to implement to get that working – to start, let's look at handlers/index.js:
// handlers/index.js

// ...
const Day = require('../store/day')

const handler = async () => {
  try {
    let repos = await Day.getRepos()
    return new Response(template(repos), { headers })
  } catch (err) {
    return new Response(`Error! ${err} for ${JSON.stringify(repos)}`)
  }
}

// ...
While the general structure of the function handler should stay the same, we're now ready to put some genuine data into our application. We should import the Day module, and inside of the handler, call await Day.getRepos to get a list of repos back (don't worry, we'll implement the corresponding functions soon). With that set of repos, we pass them into our template function, meaning that we'll be able to actually render them inside of the HTML.
Inside of Day.getRepos, we need to load the list of repo IDs from inside KV, and for each of them, load the corresponding repo data from KV. In store/day.js:
// store/day.js

const Repo = require('./repo')

// ...

module.exports = {
  getRepos: async function() {
    const ids = await todayData()
    return ids.length ? Repo.findMany(ids) : []
  },

  // ...
}
The getRepos function reuses our previously defined todayData function, which returns a list of ids. If that list has *any* IDs, we want to actually retrieve those repositories. Again, we'll call a function that we haven't quite defined yet, importing the Repo class and calling Repo.findMany, passing in our list of IDs. As you might imagine, we should hop over to store/repo.js, and implement the accompanying function:
// store/repo.js

class Repo {
  static findMany(ids) {
    return Promise.all(ids.map(Repo.find))
  }

  static async find(id) {
    const persisted = await REPO_HUNT.get(`repos:${id}`)
    const repo = JSON.parse(persisted)
    return persisted ? new Repo({ ...repo }) : null
  }

  // ...
}
To support finding all the repos for a set of IDs, we define two class-level or static functions, find and findMany which uses Promise.all to call find for each ID in the set, and waits for them all to finish before resolving the promise. The bulk of the logic, inside of find, looks up the repo by its ID (using the previously-defined key, repos:$id), parses the JSON string, and returns a newly instantiated instance of Repo.
Now that we can look up repositories from KV, we should take that data and actually render it in our template. In handlers/index.js, we passed in the repos array to the template function defined in templates/index.js. In that file, we'll take that repos array, and render chunks of HTML for each repo inside of it:
// templates/index.js

const layout = require('./layout')
const dateFormat = submitted_at =>
  new Date(submitted_at).toLocaleDateString('en-us')

const repoTemplate = ({ description, name, submitted_at, url }) =>
  `<div class="media">
      <div class="media-content">
        <p>
          ${name}
        </p>
        <p>
          ${description}
        </p>
        <p>

            Submitted ${dateFormat(submitted_at)}
        </p>
      </div>
    </div>
  `

const template = repos => {
  const renderedRepos = repos.map(repoTemplate)

  return layout(`
  <div>
    ${
      repos.length
        ? renderedRepos.join('')
        : `<p>No repos have been submitted yet!</p>`
    }
  </div>
`)
}

module.exports = template
Breaking this file down, we have two primary functions: template (an updated version of our original exported function), which takes an array of repos, maps through them, calling repoTemplate, to generate an array of HTML strings. If repos is an empty array, the function simply returns a p tag with an empty state. The repoTemplate function uses destructuring assignment to set the variables description, name, submitted_at, and url from inside of the repo object being passed to the function, and renders each of them into fairly simple HTML, leaning on Bulma's CSS classes to quickly define a media object layout.
And with that, we're done writing code for our project! After coding a pretty comprehensive full-stack application on top of Workers, we're on the final step: deploying the application to the Workers platform.
Deploying your site to workers.dev
Every Workers user can claim a free Workers.dev subdomain, after signing up for a Cloudflare account. In Wrangler, we've made it super easy to claim and configure your subdomain, using the subdomain subcommand. Each account gets one Workers.dev subdomain, so choose wisely!
wrangler subdomain my-cool-subdomainWith a configured subdomain, we can now deploy our code! The name property in wrangler.toml will indicate the final URL that our application will be deployed to: in my codebase, the name is set to repo-hunt, and my subdomain is signalnerve.workers.dev, so my final URL for my project will be repo-hunt.signalnerve.workers.dev. Let's deploy the project, using the publish command:
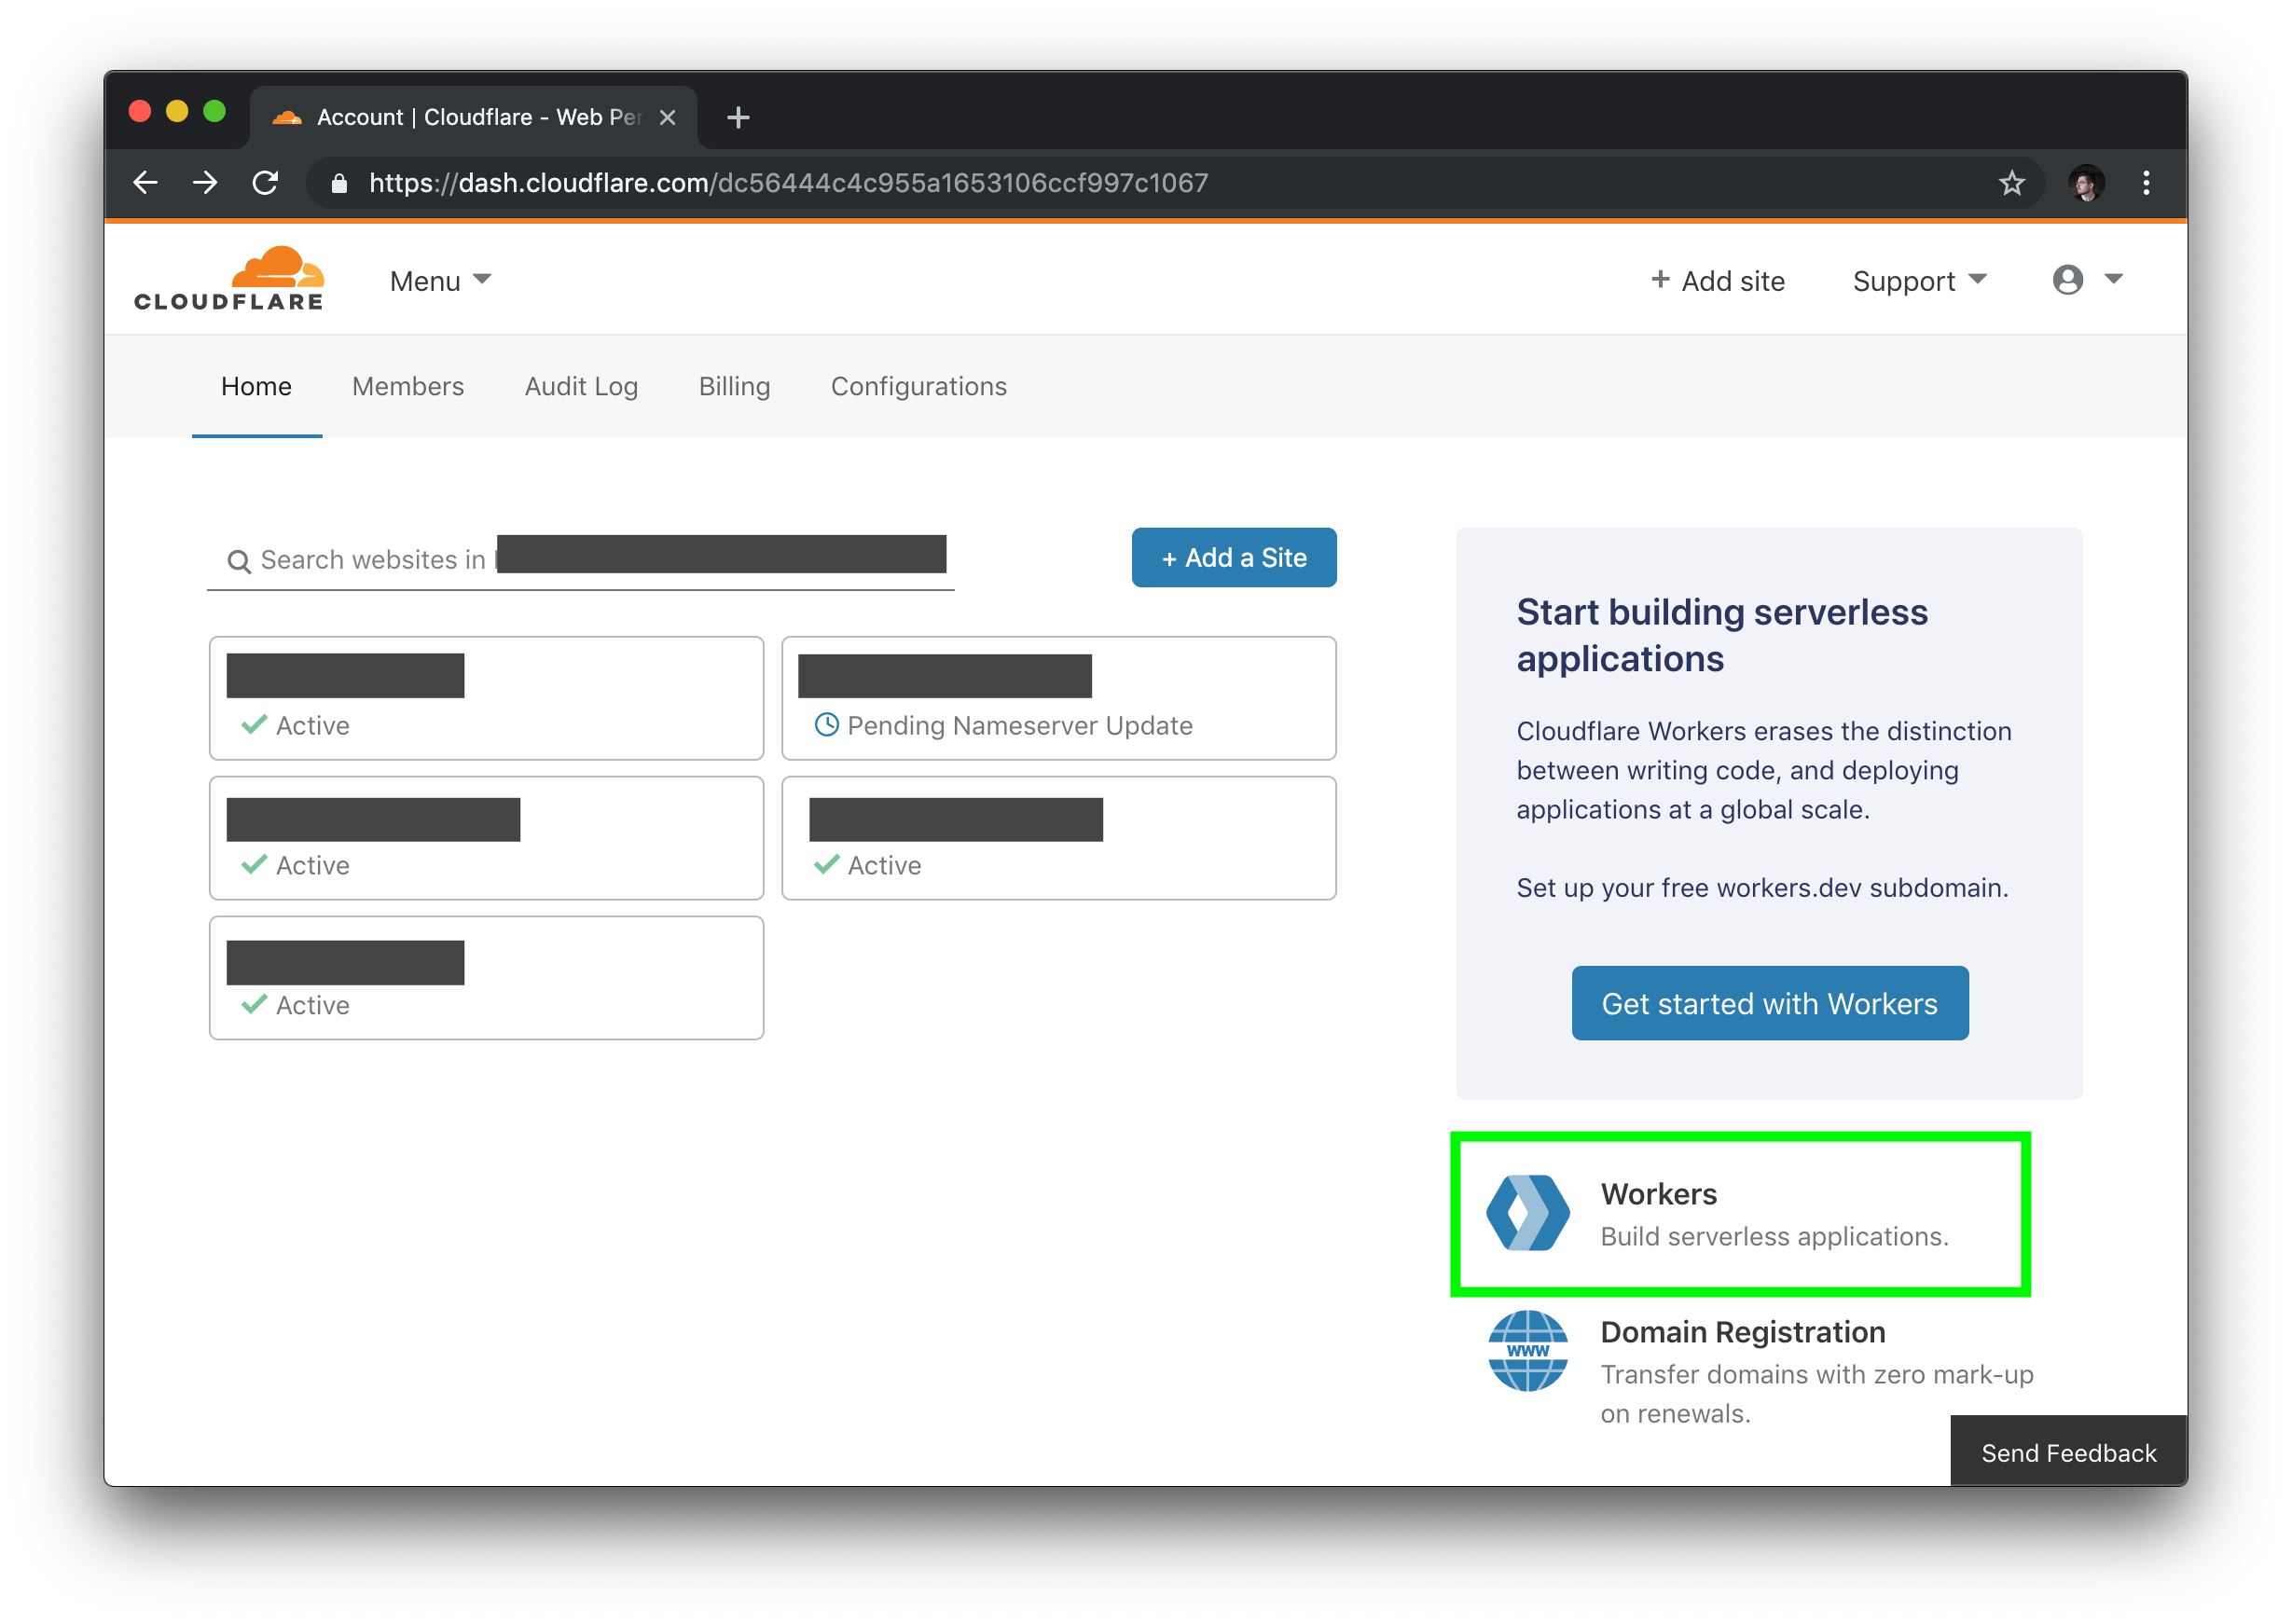
wrangler publishBefore we can view the project in browser, we have one more step to complete: going into the Cloudflare UI, creating a KV namespace, and binding it to our project. To start this process, log into your Cloudflare dashboard, and select the "Workers" tab on the right side of the page.
Inside of the Workers section of your dashboard, find the "KV" menu item, and create a new namespace, matching the namespace you used in your codebase (if you followed the code samples, this will be REPO_HUNT).
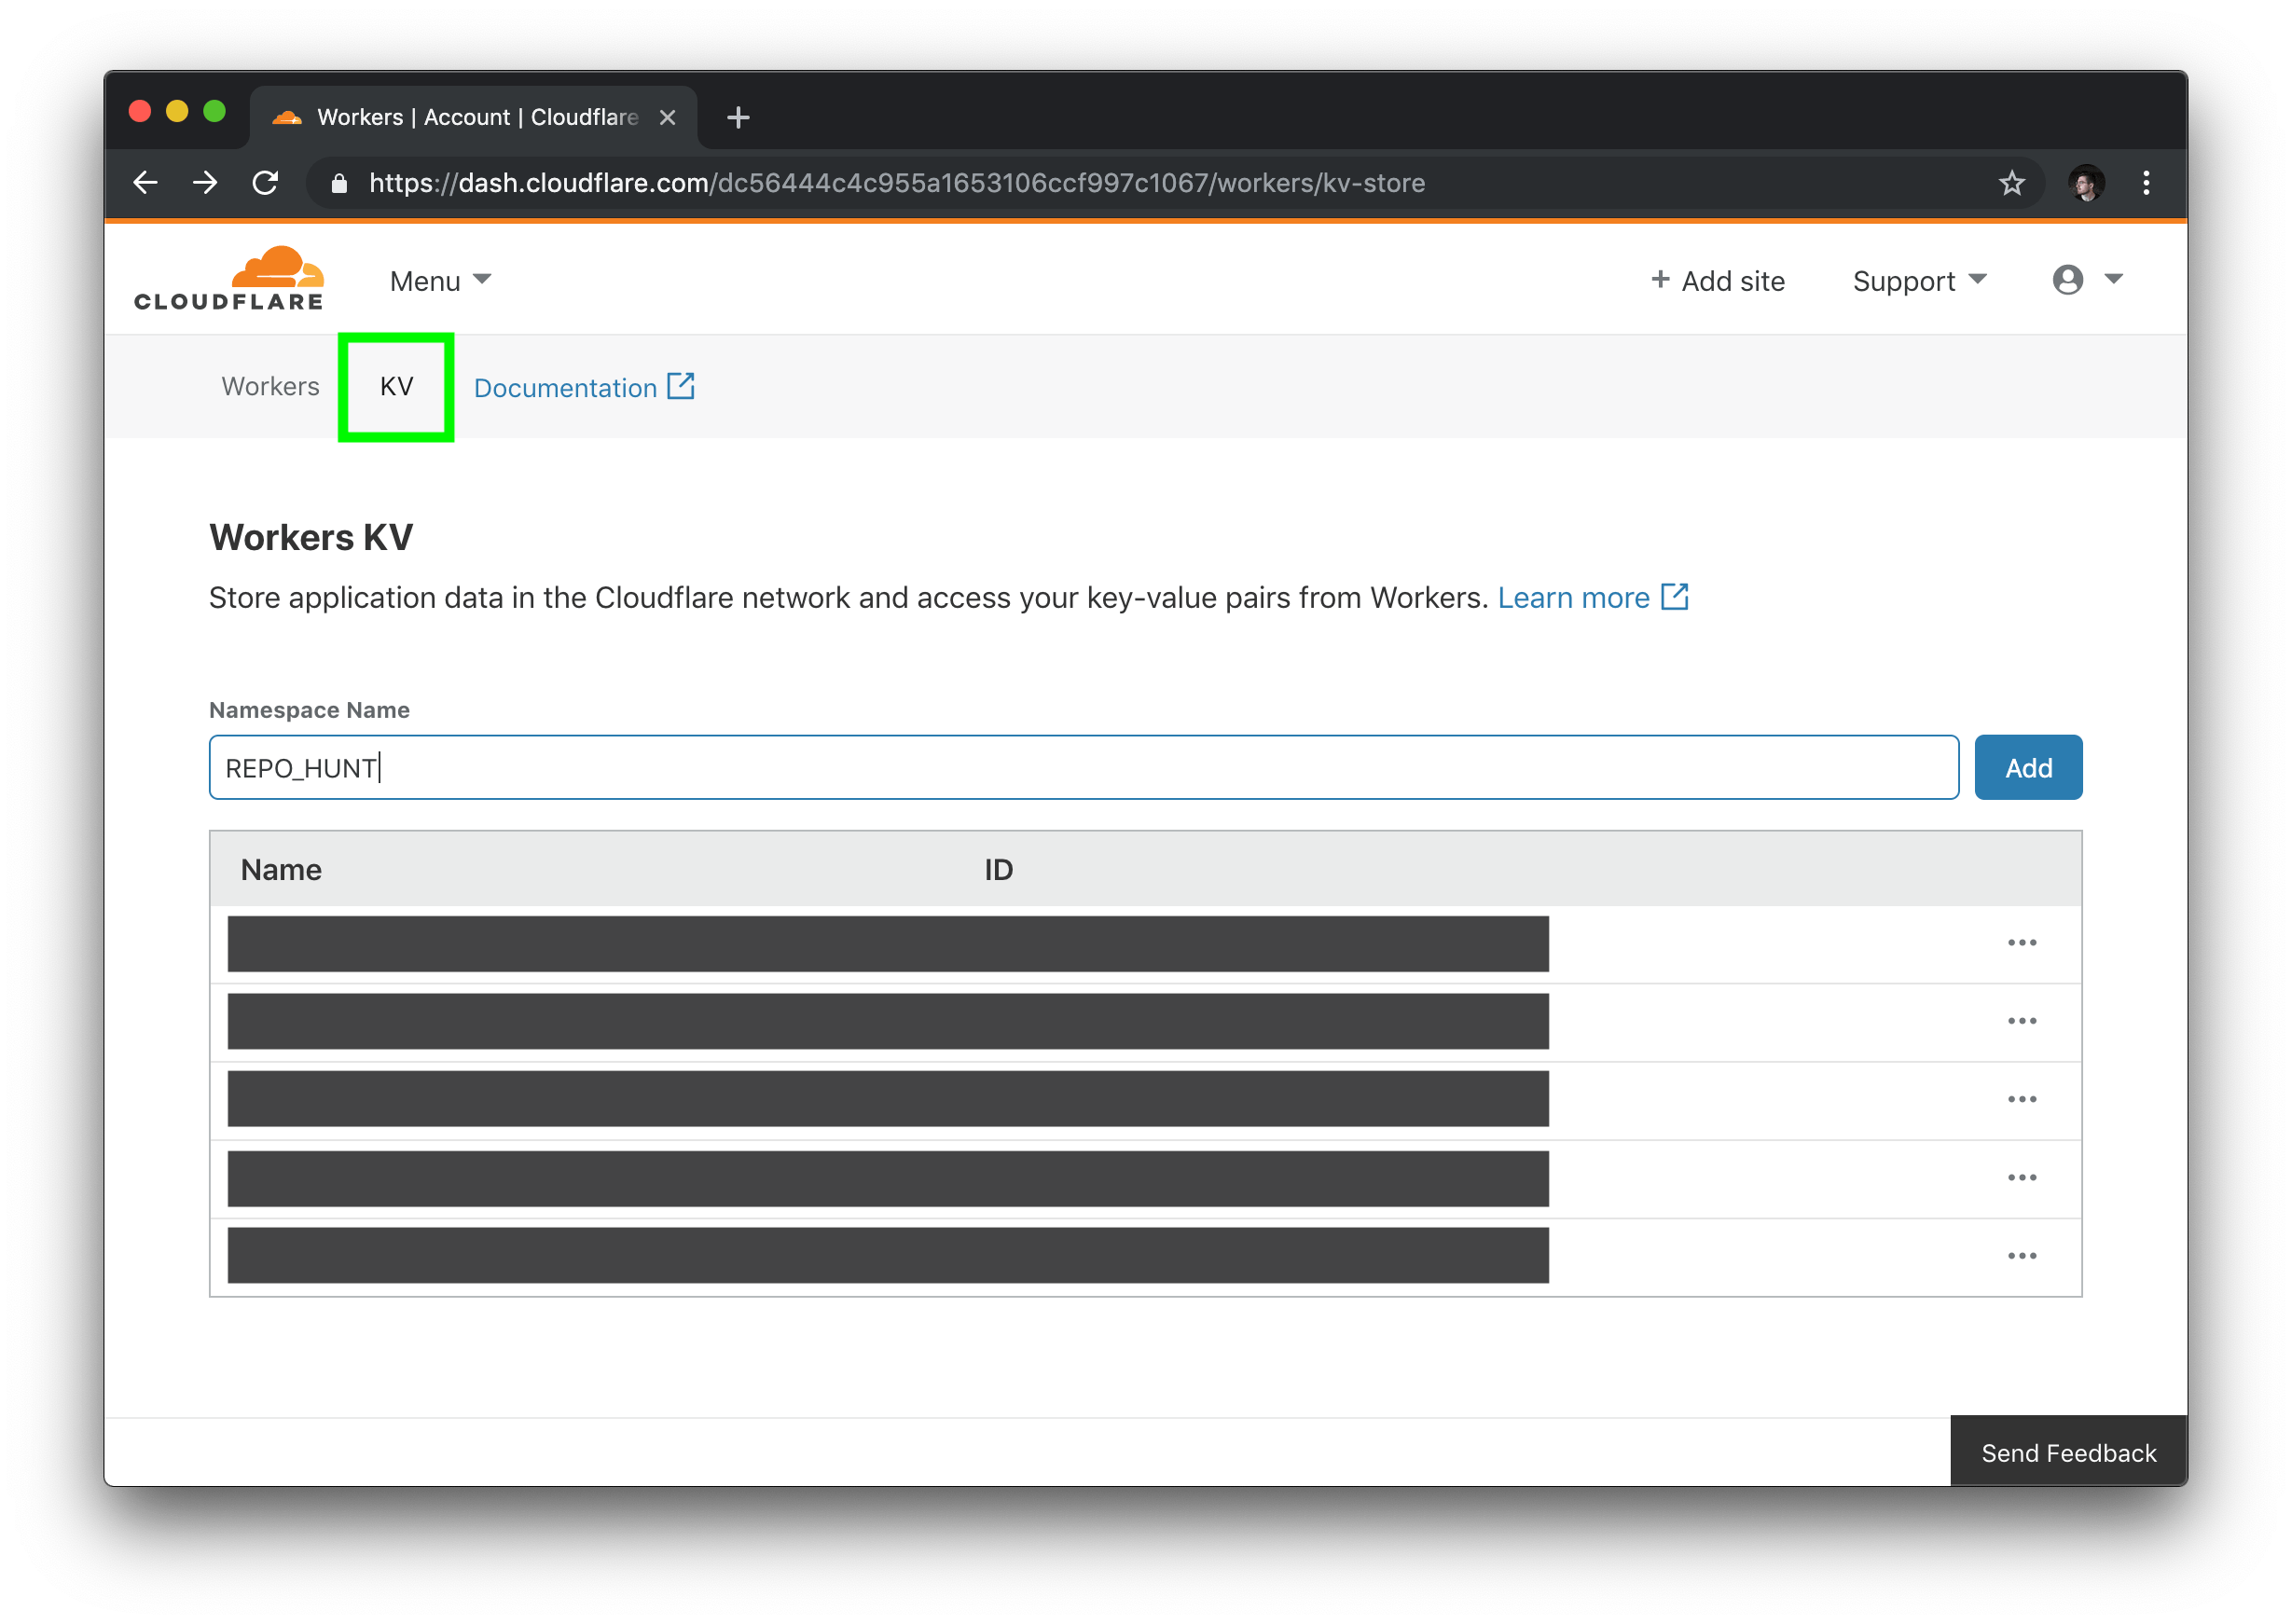
In the listing of KV namespaces, copy your namespace ID. Back in our project, we'll add a `kv-namespaces` key to our `wrangler.toml`, to use our new namespace in the codebase:
# wrangler.toml
[[kv-namespaces]]
binding = "REPO_HUNT"
id = "$yourNamespaceId"
To make sure your project is using the new KV namespace, publish your project one last time:
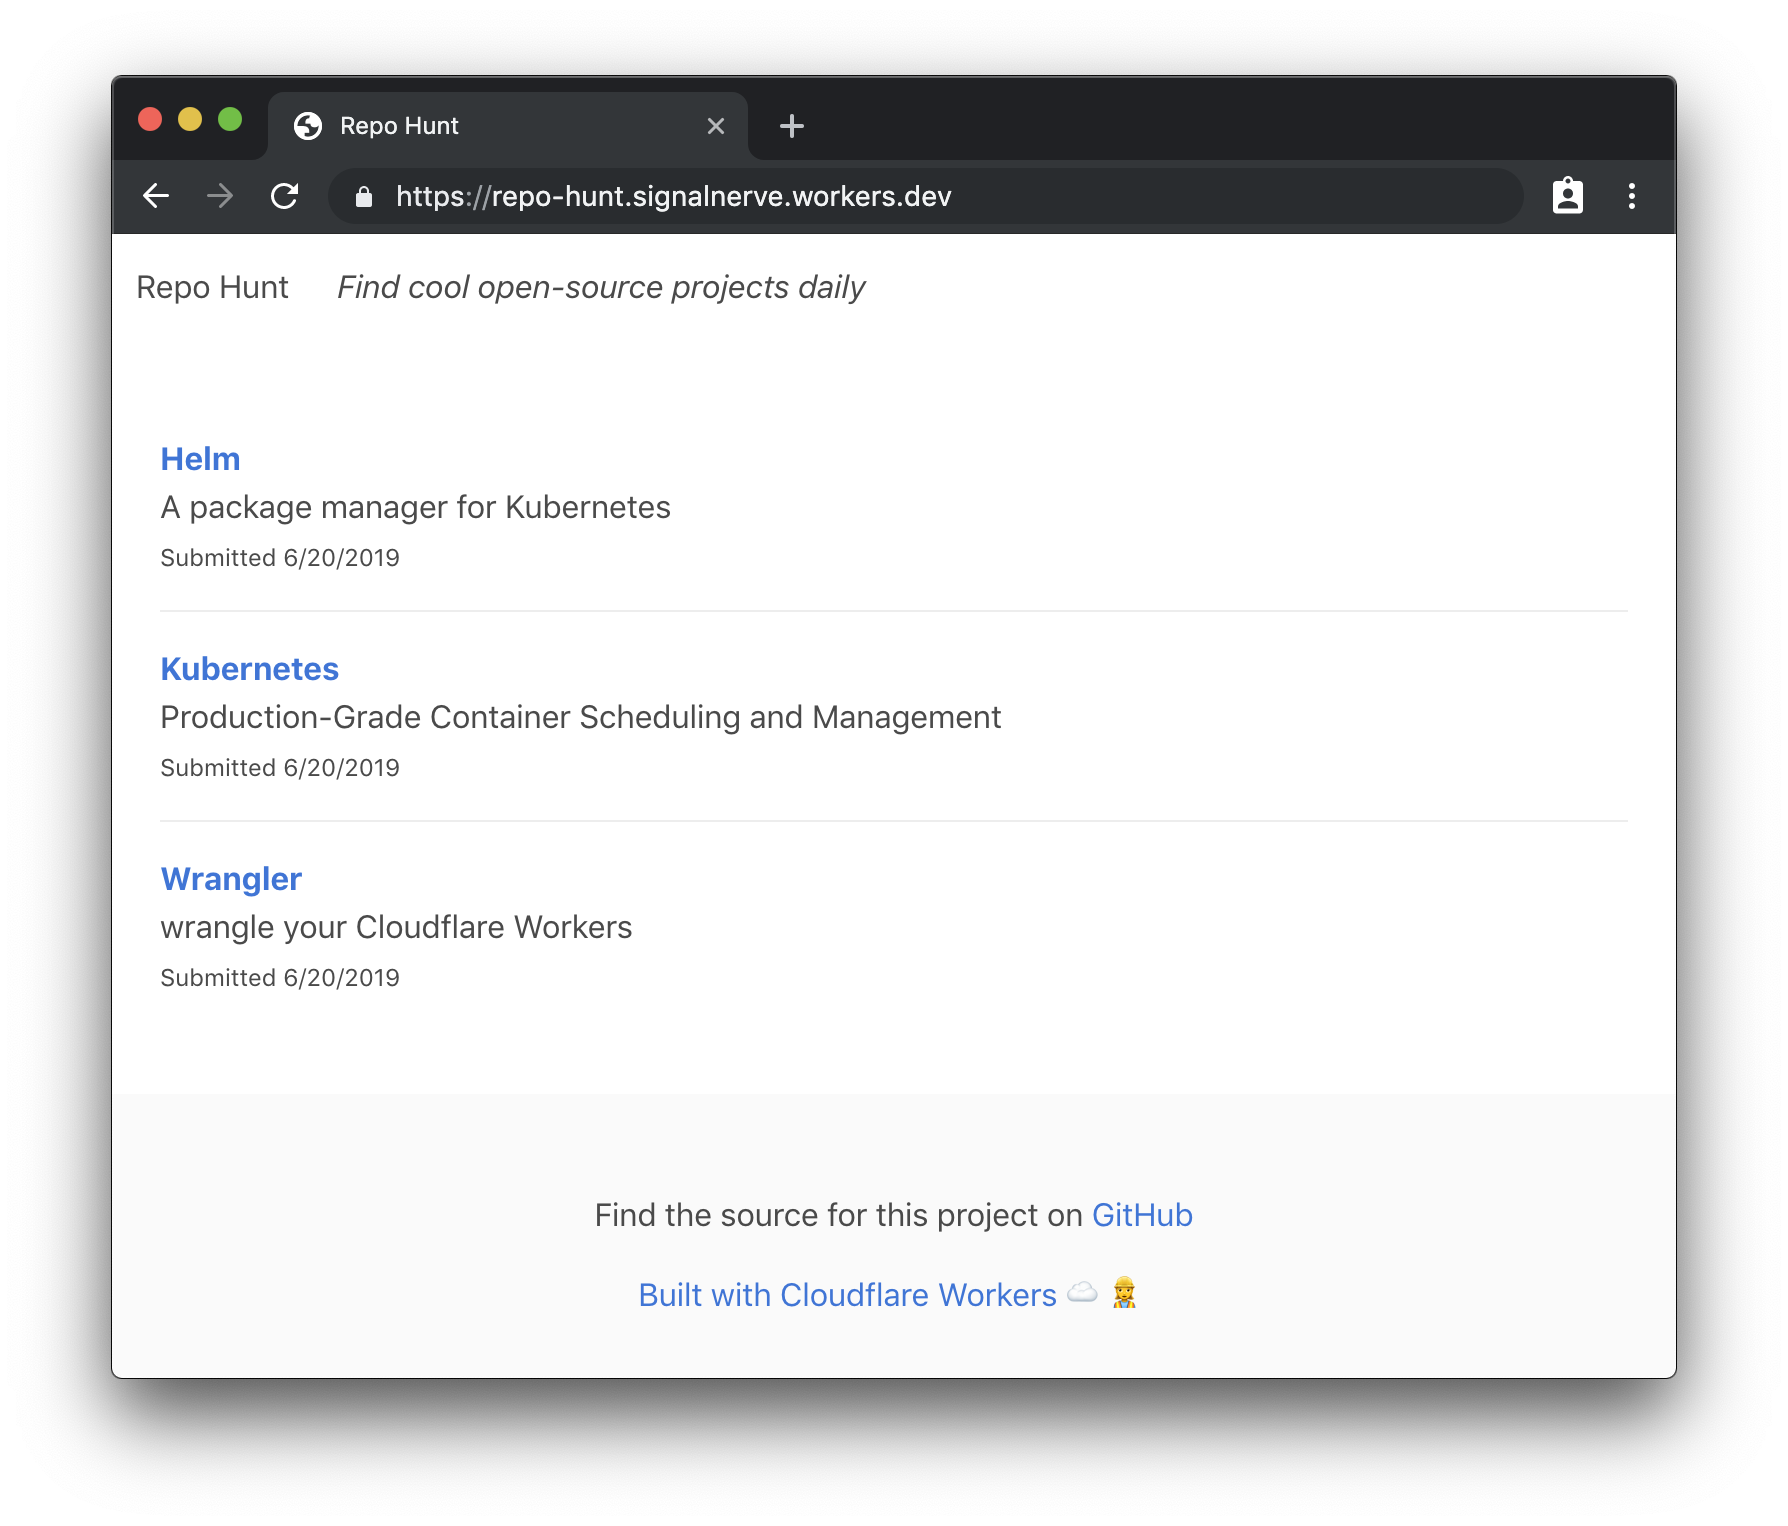
wrangler publishWith that, your application should be able to successfully read and write from your KV namespace. Opening my project's URL should show the final version of our project — a full, data-driven application without needing to manage any servers, built entirely on the Workers platform!
What's next?
In this tutorial, we built a full-stack serverless application on top of the Workers platform, using Wrangler, Cloudflare's command-line tool for building and deploying Workers applications. There's a ton of things that you could do to continue to add to this application: for instance, the ability to upvote submissions, or even to allow comments and other kinds of data. If you'd like to see the finished codebase for this project, check out the GitHub repo!
The Workers team maintains a constantly growing list of new templates to begin building projects with – if you want to see what you can build, make sure to check out our Template Gallery. In addition, make sure to check out some of the tutorials in the Workers documentation, such as building a Slack bot, or a QR code generator.
If you went through the whole tutorial (or if you're building cool things you want to share), I'd love to hear about how it went on Twitter. If you’re interested in serverless and want to keep up with any new tutorials I’m publishing, make sure to join my newsletter and subscribe to my YouTube channel!
The post Building a Full-Stack Serverless Application with Cloudflare Workers appeared first on CSS-Tricks.